
Real products have rules: this fabric doesn't come wider than 240 cm, motorisation is only for blinds above a certain size, that frame doesn't fit an outside mount. The app handles these in two layers.
Visibility rules (the shopper experience)
Visibility rules react instantly as the shopper clicks. A rule is one or more conditions plus a target:
When Mount is Outside → disable choice Z-frame with reason "Z-frames only fit inside mounts."
- Conditions combine with AND or OR.
- The target can be a whole section, an option, or a single choice.
- Disabled items stay visible but greyed out, with your reason shown in a tooltip — shoppers understand why instead of wondering where an option went.
If a shopper had already selected something that later becomes disabled, their selection is kept but ignored — and restored if it becomes valid again.
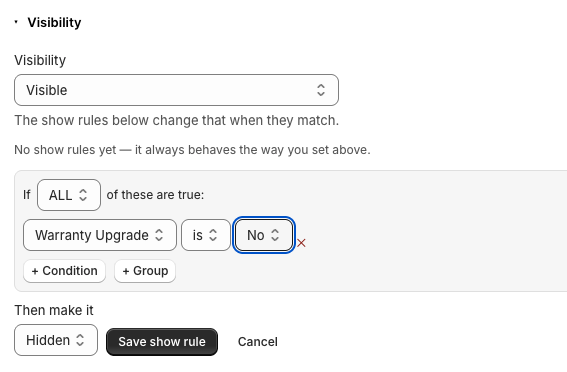
Set these up in the template's Visibility tab.
Validation rules (the safety net)
Validation rules run when it matters — while configuring and again at checkout, so they can't be bypassed. Each rule checks conditions and then either:
- Blocks with a message — "Minimum billable width is 30 cm", "This fabric is limited to 3 m²" — and the Add to cart button stays disabled, or
- Adjusts the price — an oversize surcharge instead of a hard stop.
Set them in the template's Pricing tab, under validation rules.
Which one do I want?
| Situation | Use |
|---|---|
| "These two choices can't combine" | Visibility rule (disable + reason) |
| "We can't make it this small/large" | Validation block |
| "We can, but it costs more" | Validation adjust price |
| "This option only exists for group X" | Visible-to-groups on the option |
Start permissive. Every disabled combination is a sale you might be turning away — use price adjustments where a surcharge genuinely covers the extra work.